Thursday, July 16, 2015

Chocolate Macarons Using the Spanish Method

The Spanish Method

I haven't posted a blog for over 3 and 1/2 years let alone made any more macarons. This is especially for Aubrey Smithwick.

The Spanish method is very similar to the French method except that the macarons are baked at a higher degree (160 to 165˚C) for a shorter time (approx 9 – 10 minutes) and extra confectioner’s (icing) sugar is added and sifted into the almond/sugar mixture (tant pour tant). The extra sugar gives the meringue better structure. The down side is that there is a tendency to get air bubbles in the finished batter.


Chocolate Macarons
Ingredients:

750g Tant Pour Tant (½ almond meal /flour and ½ icing sugar) sieved
37g icing sugar (confectioner sugar)
38g Callegaut Cocoa powder (26% cocoa butter)
300g Castor sugar
300g egg whites
2g crème of tartar ( a good pinch)
1 Vanilla bean
red colour (optional)

Method: Mix Tant Pour Tant with icing sugar and cocoa powder.
Whisk egg whites with a pinch of crème of tartar.
Add the caster sugar in three additions.
Add the scraped vanilla seeds and at the last moment add into the Tant Pour Tant
You can add a few drops of red colouring to high-light the chocolate colour if you want.
Then follow my instructions in http://bakeitoff.blogspot.com.au/2009/10/macarons-tips-tricks-and-how-to.html   - How to ‘Macaronner’

Pipe on to a double tray and sprinkle with cocoa nibs. This adds a bitter taste to compliment the chocolate.
Bang on the bench a couple of times to remove air bubbles.
Let sit for 20 minutes for small, ½ hour for average and 1 hour for larger.
Bake in an oven at 160 – 165’C for approximately 9 minutes.

If making other flavours, remove chocolate and add 38g more Tant Pour Tant.

Sunday, January 15, 2012

Mini Pumpkin and Spinach Frittata


I made these lovely little mini pumpkin and spinach frittatas for a fund raising even. They are quick, and easy to make, yet are fabulously delicious. They are great for finger food at parties, for light lunches served with a side salad, and ideal for weekend breakfasts. They also freeze beautifully.

Ingredients:

600g butternut pumpkin, peeled and diced into 2 cm pieces
2 Tbs olive oil
1 cup baby spinach leaves, stems removed
1 cup (250g) ricotta cheese
1/2 cup (60g) grated Parmesan cheese
1/2 cup (60g) grated cheddar cheese
6 eggs
1 tsp paprika
salt and freshly ground pepper
1 punet cherry tomatoes
1 bunch Italian (broad-leaf) parsley

Preheat oven to 180°C (160°C fan forced). 

Lightly grease a medium sized 12 muffin tray with non stick oil spray.

Place pumpkin on a baking tray. Drizzle with the oil and toss well. 
Bake for 15-20 minutes, until tender. 

Sprinkle the spinach with a small amount of water. Microwave or cook spinach until just wilted. 

Let the pumpkin and spinach cool.

In a large bowl, whisk together eggs and cheeses, paprika and seasoning until combined. 
Mix in the pumpkin and spinach. Spoon the mixture into the prepared muffin tin making sure the pumpkin is evenly divided between muffin holes. 

Pierce each cherry tomato with a sharp knife and place one on each frittata.
Bake for 25-30 minutes until the muffins are set and browned on top and are puffed up.

To garnish, gently wedge a leaf of parsley between the tomato and the frittata.
They can be served hot, while still puffed up similar to a souffle. 
As they cool, they will deflate somewhat but will still be delicious.

Sunday, June 5, 2011

Parmesan Cookies (biscuits)


Mr G has been out yachting as one of the crew on the beautiful White Swan, a 57-foot luxury yacht. When the yacht returns to the marina, the team have a few well earned beers, some nibbles, and Mr. G and friend play their guitars and sing to entertain the rest of the crew. For me, this is a good excuse to do some baking. So this time, I bought a nice selection of cheeses and made enough Parmesan biscuits for all the crew.

Parmesan Cookies
In Australia, we call cookies biscuits.

(Makes 50)

200 grams unsalted butter
200 grams plain flour
200 grams Parmigiano Reggiano (parmesan) cheese
pinch salt
½ teaspoon hot (or sweet if preferred) paprika
black sesame seed to garnish

Pulse the butter and flour in a food processor briefly until it resembles breadcrumbs. Add the cheese, salt and paprika. Process quickly until the dough forms a stiff ball. Divide the dough into 2 pieces, and then roll each piece into a log, about 3 cm (1 ½ inches) in diameter. Wrap the dough logs in parchment paper and chill in the refrigerator for about an hour.

Preheat the oven to 200°C (400°F) and position a rack in the upper and lower third of the oven. Remove the logs from the refrigerator one at a time. Slice each log width-wise into 6mm (¼ inch) thick rounds and arrange the slices, well apart, on parchment lined baking sheet. sprinkle some sesame seeds on each biscuit. Bake for 15 minutes, or until golden (turning them halfway if necessary to get evenly browned. Let the cookies cool for 10 minutes, and then transfer them to a wire rack to cool completely. They can be stored for up to 5 days in an airtight container.

The White Swan


The spinnaker


Friday, July 2, 2010

GUV'S ON FERNBERG - BED AND BREAKFAST

GOOD MORNING BRISBANE


I've just spent 2 weeks in Queensland with Mr 'G' visiting my mother. We wanted to stay in Brisbane for a few days to visit folkie friends and maybe do a bit of a gig at the Kookaburra Restaurant in Paddington. Stupidly, not being footy fans, we did not allow for the 'State of Origin' and hadn't booked accommodation. After spending the afternoon searching to no avail, we decided to call in to the Kookaburra Restaurant, drop off our guitars and have a coffee. Thankfully, Steve Hall, owner of the Kookaburra Restaurant, saved the day. Steve and his delightful wife, Liz, have a B&B
- Guv's On Fernberg, 3km from the CBD.

We couldn't believe our luck as we would have had to drive back down to the Gold Coast or up towards the North Coast to get accommodation.

What a find! Guv's On Fernberg - Located directly opposite Government House, 175 Fernberg Road, Paddington and just a short walk to the Suncorp Stadium.

We were so fortunate that Guv's have only been operating for a few months or it would have been booked out. The house, a lovely old Queenslander built in 1865, is absolutely stunning, now fitted with modern amenities, with luxurious, yet comfortable rooms.

The light-filled queen sized rooms all have en suites, are tastefully furnished and decorated with individual themes. Liz and Steve are the perfect hosts and very warm and welcoming. I felt more like a friend than a paying guest.


We stayed two nights in the first week in a room overlooking the Brisbane skyline including the Suncorp Stadium (within easy walking distance).

Then drove up the coast to visit my mum for a few days. We returned and spent two nights again in the second week but in a room overlooking Government House.

Liz is a gourmet cook, with a background in home economics. Her A 'La Carte breakfast is a lavish spread, out on the patio, overlooking the beautiful garden, and views of the city and Government House. Apparently when the Queen is in town, she breakfasts on the balcony of Government House overlooking Guv's. I must admit that I felt like the Queen myself sitting on that balcony. Great food, fantastic service and beautiful views.

We were awakened by a gentle knock on the door. The table was discreetly laid and fresh brewed coffee seem to miraculously appear on the table.

Freshly squeezed juice (pink grapefruit or orange juice), granola style cereal with yoghurt, fresh passionfruit and fruit salad.
Scrambled eggs in crepes with bacon and mango chutney.
Gourmet sausages marinated in marmalade with kumara on the side (simply stunning).
Eggs Benedict with spinach, hollandaise sauce and smoked trout.
Note: On the morning we were leaving for Melbourne, 'B' wanted to be on the road early. It was cool in the moring so Liz lit the fire in her own gorgeous kitchen where we had our favourite - eggs Benedict with spinach, hollandaise sauce and smoked trout again (by request - pure bliss).

(Where's mine!!!)
We relaxed on wide Victorian style verandahs decorated with lavish wrought iron lacework.


Beautiful architecture

The garden and views were spectacular
Thanks Liz and Steve,
Guv's was the highlight of our holiday.

175 Fernberg Rd,
Paddington QLD
Hosts Liz and Steve Hall
Ph: 0417 173 576
or 07 3368 1334

GOOD NIGHT BRISBANE


Tuesday, May 18, 2010

French Perigordine Walnut Cake


As I had bought too many walnuts for another recipe, I had a perfect excuse to try something different. I've started learning French in the last few weeks so thought I would try something French. I found a lovely flourless recipe for French perigordine walnut cake on Videojug. It is very easy too make, has only a few ingredients, but yields a rich, moist cake - simply decorated with just a sprinkle of icing sugar and garnished with extra walnuts.

Serves 6 to 8.


Ingredients:
250 grams shelled walnuts
120 grams unsalted butter
250 grams brown sugar
4 eggs (separated)
pinch of salt

Topping: 1 - 2 tablespoons icing sugar (confectioner's sugar)extra walnuts for garnish
Preheat oven to 170°C (150°C fan-forced). Grease a 22 - 23cm (9 inch) springform cake tin and line with baking paper. In a food processor, grind the walnuts until
they are the size of breadcrumbs.

Using an electric mixer, cream the butter and sugar for 3 to 4 minutes. Add the pinch of salt, then the egg yolks one at a time, beating well after each addition. Add the ground walnuts, stirring in with a rubber spatula until combined.

In a separate bowl, whisk the egg whites until you have stiff peaks. Fold one quarter of the beaten egg white into the walnut mixture to loosen it, then gently fold in the remaining egg white, folding as lightly as possible until incorporated.

Pour the batter into the prepared cake tin. Bake for 45 to 50 minutes or until an inserted skewer comes out clean. Leave in the cake tin for 10 minutes, then remove
from the tin and leave to cool on a cake rack. When cool, sprinkle with icing sugar
and garnish with extra walnuts.

This cake improves when kept for a day or two in an airtight container.


Sunday, April 11, 2010

Healthy Fresh Picked Home Grown Produce


There's nothing nicer that healthy fresh picked home grown produce. Here are some of the lovely fruits, nuts and vegetables grown by my friends - Zdena's and Vanessa. I just wanted to share it with you.

Friday, April 9, 2010

Nigella's Nutella Cake (Torta alla Gianduia)


I needed something quick and easy to make, yet I wanted it to be special. This is the second time I've made Nigella Lawson's Nutella cake (Torta alla Gianduia) and it fit the bill perfectly.  It's so irresistible and elegant with it's glossy dark chocolate ganache and toasted hazelnuts on top. It is dense and moist with a wonderful hazelnut taste. This, no doubt, comes from a whole jar of Nutella and an added tablespoon of Frangelico Hazelnut Liqueur. It has a wonderful texture from the ground hazelnuts and a subtle crunch from the toasted hazelnuts as you bite into it.


I won't reinvent the wheel - the recipe is on Nigella's website (here) and also in her book - "How to be a Domestic Goddess" (page 172).


Hazelnuts fresh off the tree from Zdena's and Vanessa's new little hazelnut tree.

Sunday, April 4, 2010

The Amazing Orange Cake


I have been very busy in the last two months looking after my very sick elderly friend. I am sad to say that he has passed away. I now have time to bake once again which is a nice way to ease the pain.


I have made this beautifully light, moist orange cake, full of flavor from fresh orange juice and zest. The recipe is adapted from Margie Agostini's Amazing Orange Cake from Caffe Agostini in Sydney via the lovely Jill Dupleix's webpage.

I have halved the ingredients and made the 22cm cake. Serves 8

Ingredients:

250 grams unsalted butter
250 grams castor sugar
4 x 60 gram eggs
grated zest of 1 Navel orange (for the best zest)
250 grams self-raising flour
100 ml freshly squeezed orange juice
For the icing:
250 grams pure icing sugar
50 ml orange juice

Preheat oven to 170°C. Grease a 22 cm springform cake tin and line with baking paper. Cream the butter and sugar well, until it is very pale and thick - this will take 3 to 4 minutes. Add the eggs one at a time, beating well after each addition. Add the flour and zest and beat well. Slowly add the orange juice, mixing well until it is incorporated. Pour the batter into the prepared cake tin. Bake for 45 to 50 minutes or until an inserted skewer comes out clean. Leave in the cake tin for 10 minutes, then remove from the tin and leave to cool on a cake rack.

Mix the orange juice into the icing sugar. Ice the cooled cake and allow the icing to drizzle down the sides of the cake.


Dark Chocolate, Pear and Pistachio Cake


Edited 19/04/2010
A family gathering for Easter was the perfect excuse to bake a cake. This dark chocolate, pear and pistachio cake recipe has been adapted came from the April 2010, Australian Gourmet Traveller's Chef's Recipes - originally supposedly originating from Tartine in Armadale, Melbourne. According to the FiFi Report 042it was first published in Vogue Entertaining 2001. This moist delicious cake has a wonderful texture. The sweet pears, the fragrant pistachio nuts, along with the dark chocolate, and luscious velvety ganache make this cake simply irresistible.


Ingredients

200 grams good quality dark chocolate, chopped
70 grams (3/4 cup) pistachio nuts (plus extra for garnish)
150 grams unsalted butter, softened
150 grams caster sugar
3 X 60 gram eggs
150 grams plain (all purpose) flour
1 teaspoon baking powder
pinch of salt
1 firm ripe pear( peeled, cored and diced)


For the chocolate ganache:
150 good quality dark chocolate, chopped
150 ml pure cream (pouring cream)

Directions

Preheat oven to 180°C (160°C fan forced). Grease a 22 cm springform cake tin and line with baking paper.


In a food processor, grind the chocolate and pistachio nuts to a coarse crumb (don't make it too fine). Set aside.

In a separate bowl, cream the butter and sugar until light and fluffy. Add the eggs one at a time and beat until well combined. Sift the flour, baking powder and salt together. Stir into the creamed mixture.

Stir in the chocolate and pistachio crumbs, then the diced pear. Pour into the prepared cake tin.

Bake for 50 to 60 minutes or until skewer inserted coes out clean.

Allow to cool in the tin for 10 minutes then turn onto cake rack to cool to room temperature.

For the ganache, combine chocolate and cream in a heatproof bowl over a saucepan of simmering water. Stir with a metal spoon until smooth. Remove the bowl from heat and set aside to cool, stirring occasionally, until the ganache is thick and spreadable. Smooth the ganache over the top of the cake and let it drizzle over the sides. Garnish with the extra chopped pistachio nuts. The cake will keep for 3 days in an airtight container.


Sunday, January 31, 2010

Tangy Lime Tart (Tarte au Citron Vert)


Tahitian Limes were 7 for $2.00AU at the Vic market on Thursday. I couldn't resist buying them with the thought of making this sublime zingy tart. The sweet pastry has a delectable crumbly melt in the mouth sweet pastry. It is enriched with an extra egg yolk. The recipes I have used are an adaption of the 'Lemon Tart Filling' and 'Sweet Pastry' from Justin North's "French Lessons". As timing and oven temperature used were not given in Justin's book, I have used a similar recipes from Loretta Sartori's 'The Cooks Book - Patisserie' (2004).


Tangy Lime Tart (Tarte au Citron Vert)

Ingredients:
140 gm cold unsalted butter diced
100 grams icing (confectioner's) sugar
pinch of salt
1 egg, lightly beaten
230 grams plain flour
20 grams cornflour
750 ml lime filling (recipe follows)

In an electric mixer, cream the butter and icing sugar until lightly creamed. Add the salt and slowly drizzle in the beaten egg. Continue beating until you have a smooth mass. Sift the flour and conrnflour together and add to the bowl. Mix until it just comes together.

Place the dough on to a lightly floured work surface. Using your hands, shape it into a smooth flattened ball. Wrap in plastic wrap and chill for half an hour before using. This stops the pastry from shrinking. Knead the dough lightly to soften a little. Flour your work surface and roll out to fit the tart tin. Chill once again.

Blind bake the prepared empty tart case to prevent it from becoming soggy and to stop it from rising while baking.  To do this, line the base and sides of the uncooked pastry case with non-stick baking paper, then foil, pressing the foil flush with the base of the pastry case and up the sides. Fill with baking weights or dry beans. Place on a baking tray and cook in a preheated oven 170°C (340°F)  for 20 minutes. Remove the pastry case from the oven and remove the baking weights or beans. Cook for a further 5-10 minutes or until light golden. Let it cool. Keep an eye on the baking so as not to over do the edges. Note: While baking with the filling, I place aluminum foil underneath the tart tin and bring it up the edges and fold and crimp it in over the sides of the tart shell to prevent it from browning too much.

Heat the oven to 160°C. Gently pour the lime filling into the prepared tart case. Carefully transfer to the oven. Bake for 50 to 60 minutes. The filling should still wobble gently. Let it cool.

Lime Filling
This recipe makes 750 ml which is enough to fill a 22 cm x 2 cm tart tin.

5 whole eggs
1 egg yolk
130 grams castor (superfine) sugar
200 ml cream
130 ml lime juice, strained (juice from 4 limes)
1 teaspoon lemon zest

In a large mixing bowl, combine the eggs, extra yolk and sugar and gently whisk until well combined. Stir in the cream, lime juice and lemon zest. You can use lime zest if you prefer, but I personally find it a little bitter. Cover and leave to infuse overnight in the refrigerator. It can be prepared up to 2 days before hand if required.

Overall
The tart tasted sublime. However, the pastry case shrunk more than I would have liked. Next time I will stick to 123 Sweet Pastry dough recipe I usually use (it is always successful, is crumbly with a melt in the mouth feel). I had too many bubbles. Probably because I gave it a good whisk before filling the tart. I baked this tart for only 40 minutes on conventional and it was slightly overdone and not wobbly.

Friday, January 22, 2010

Raspberry Frangipane Tart


I was inspired to make this lovely raspberry frangipane tart after my recent visit and stay at a berry farm in Tasmania. After tasting the beautifully ripe and lucsious raspberries I was reminded of how, as a child, I was always delighted by the beautiful fragrance of the frangipane flowers. 

The closest thing in taste to this beautiful fragrance is almond frangipane.  And what could be a better compliment to the almond frangipane than the raspberry. 


Sweetened Shortcrust Dough


This is a lovely tender pastry commonly know as '123'. The ingredients are calculated by weight - 1 part sugar, 2 parts fat and 3 parts flour with the addition of an egg. The trick to keeping the pastry tender is not to over handle it which causes it to become tough and the finished pastry greasy.

This recipe makes 650 grams of pastry. I often double the amount and then freeze half for another day. Just leave it in the fridge overnight to defrost before using.


Ingredients:
200 grams (7 oz) unsalted butter
100 grams (3.5 oz) caster (superfine) sugar
1 large egg (55 gram/2 oz)
300 grams (10.5 oz) plain (all-purpose) flour
pinch of salt 


Method:
Using an electric mixer, cream the butter and sugar lightly. Add the egg and continue mixing until the egg is absorbed. Fold in the flour and salt, mixing only until it is combined. 
The dough will be rather sticky. Wrap in plastic wrap and chill for half an hour before using. This stops the pastry from shrinking. Knead the dough lightly to soften a little. Flour your work surface and roll out to fit a 28 cm tart tin. Chill once again.
Blind bake the shortcrust pastry to prevent it from becoming soggy and to stop it from rising while baking.  To do this, line the base and sides of the uncooked pastry case with non-stick baking paper, then foil, pressing the foil flush with the base of the pastry case and up the sides. Fill with baking weights or dry beans. Place on a baking tray and cook in a preheated oven 170°C (340°F)  for 20 minutes. Remove the pastry case from the oven and remove the baking weights or beans. Cook for a further 5-10 minutes  or until light golden. Let it cool.


Frangipane Filling


Ingredients:
100 grams (3.5 oz) butter 
75 grams (2.5 oz) castor (superfine) sugar
120 grams (4.5 oz) almond meal (ground almonds)
1 teaspoon rose water
pinch of salt
2 large eggs (110 gram/4 oz)


Method: 
Cream the butter, sugar and almond meal. Add the salt and the rose water, then the eggs. Continue mixing until they are absorbed and the mixture is light and pale.
Note: You can roast the almond meal first to help bring out the flavour. Keep an eye on it so it doesn’t burn. Spread it out on a baking tray and place it in the oven at 150˚C (300˚F) for 5 minutes and then cool it down completely before using. 


Assembling the tart


500 grams (approx 17 oz) raspberries
Preheat the oven to 180˚C (360°F). Spread a layer of the frangipane into the baked pastry case and spread it out evenly with a palette knife. Starting from the outside and working towards the middle of the tart, arrange the raspberries on top, nestling them upside down in concentric circles and very gently pushing them into the frangipane. Bake for 50 minutes or until the frangipane is golden on top. Cool slightly then glaze.  


For the glaze


1/2 cup of rose jam (or red currant jam)  
1 teaspoon rose water for the glaze
Heat the  jam in a small saucepan over medium heat. Simmer until it becomes a liquid.  Remove from heat and strain through a fine strainer to remove petals.  Cool slightly, then using a pastry brush, lightly brush the top of the tart with the glaze. Cool. 


Serve either warm with ice-cream or let it cool and serve with whipped cream.


Tasmanian Brown Trout with Garlic and Almond


We've just returned from ten days in Tasmania. Four of those days were spent in the Derwent Valley,  with a beautiful tranquil environment surrounded by pasture and bushland, overlooking acres of raspberry and blackcurrent bushes.  In the distance, there were spectacular views of the Wellington Mountain Range. Mr. G. spent the mornings fly fishing on the Tyenna River, a ten minute walk away. 


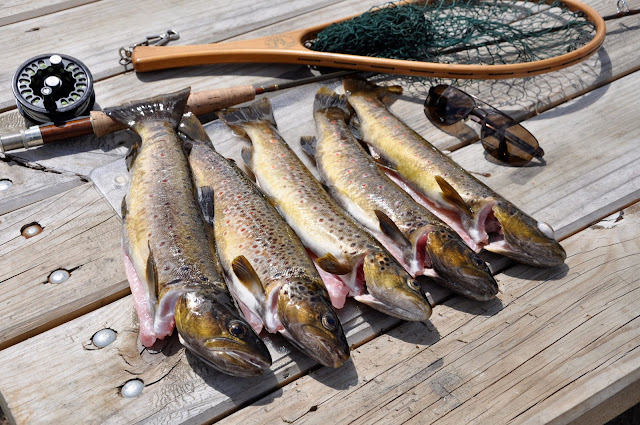
Freshly caught Tyenna River brown trout with Hungarian paprika, garlic and slivered almonds done to perfection by Mr. G. along with some local crusty bread and wine


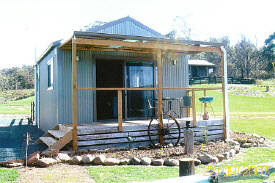
We stayed in a small cabin overlooking a berry farm.


The Teyenna River


Tasmanian Bumble Bee


Mr. G's catch of the day